

Planning in Cubic Meters, Not Square Meters, in Warehouses
Planning in Cubic Meters, Not Square Meters, in Warehouses
Planning in Cubic Meters, Not Square Meters, in Warehouses
In warehouses, capacity should be evaluated not only by square meters but also by usable volume. In this content, you can examine the impact of cubic-meter-focused planning on rack selection, aisle layout, height utilization, and operational efficiency.
Why is it important to plan in cubic meters instead of square meters in warehouses? Ways to increase capacity in the same area with racking systems, height, and aisle decisions.
In warehouses, capacity should be evaluated not only by square meters but also by usable volume. In this content, you can examine the impact of cubic-meter-focused planning on rack selection, aisle layout, height utilization, and operational efficiency.

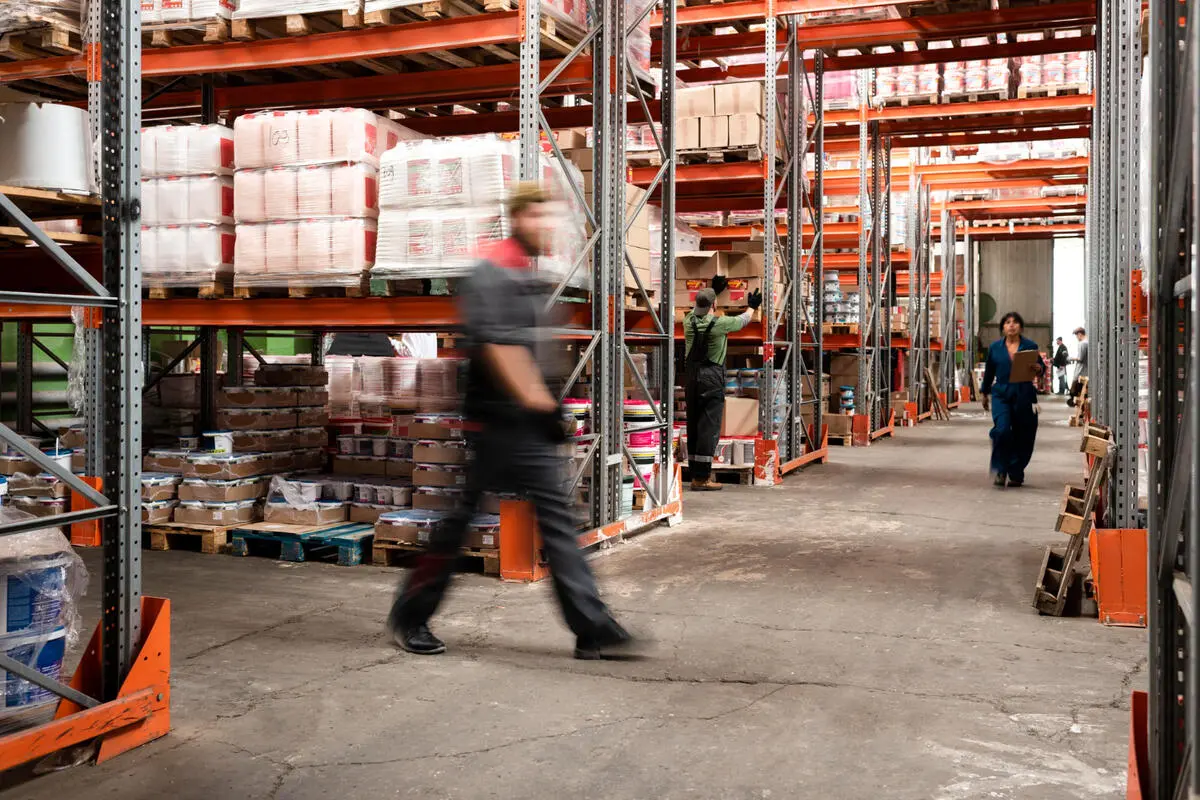
In warehouse planning, it is a common mistake to read capacity only through square meters (m²). m² shows how much floor area there is. Yet the factor that determines cost and increases capacity in a warehouse is volume, which also includes height. In other words, cubic meters (m³).
Within the same m², the right warehouse racking system, the right racking system layout, the right aisle design, and the right level adjustment can significantly increase storage capacity. This approach is the fastest way to increase capacity without renting a new warehouse or expanding the building.
What Does Thinking in Cubic Meters Mean in Warehouse Planning?
Cubic meter planning centers on the question, “How many m³ of volume will I use efficiently for storage?” instead of “How many m² of racks will I install?”
The simple distinction is clear:
m²: the area you occupy on the floor
m³: floor area × usable height
Height is not always fully used in warehouses. Sprinkler clearances, lighting, beam underside limits, forklift lifting height, and product/pallet height all come into play. Cubic meter planning shows how to use the volume efficiently despite these constraints.
Why Does Planning in m³ Instead of m² Produce Better Results in Warehouse Racking Systems?
m²-focused planning often creates a warehouse that spreads out on the ground. Aisles get wider. Rack heights stay low. It may seem easier to access, but capacity becomes expensive. m³-focused planning uses height in a planned way.
The effect of the m³ logic on warehouse racking systems is usually seen in the following areas:
Creating more pallet positions in the same area
Delaying the need for warehouse expansion
Reducing storage cost per product
Managing operational flow more effectively through aisle and layout design
Measuring investment in warehouse racking systems by “net capacity increase,” not by “m²”
Critical Inputs for Cubic Meter Planning in a Warehouse
For m³ planning, ceiling height alone is not enough. A sound calculation starts with these inputs:
Net internal height (actual limit below beams / sprinklers)
Product and pallet dimensions (especially height distribution)
Number of levels and level spacing (rack pitch)
Aisle width and maneuvering space
Forklift type and safe lifting height
Fire safety clearances (sprinkler distances, etc.)
Mandatory areas inside the warehouse (columns, doors, emergency exits, staging area)
Without clarifying these data, saying “this racking system stores more” is often just an assumption.
The Difference Between Gross m³ and Usable m³
A quick rule of thumb:
Gross volume (m³) = Warehouse area (m²) × Net warehouse height (m)
However, the volume used in storage is not the entire gross volume. Because:
The product height and level spacing inside the rack do not fully match, leaving empty space.
Aisles may not “consume” volume, but they define the layout and limit the volume where racks can be installed.
Fire and operational clearances are mandatory.
Rack components and safety distances affect capacity.
That is why, in practice, it helps to think like this:
Usable volume ≈ Gross volume × (utilization efficiency)
Utilization efficiency changes depending on product variety, stock turnover rate, rack height, and the selected warehouse racking system type.
Simple Calculation Example for a Warehouse Racking System: Seeing the m³ Difference in the Same m²
Let’s assume:
Warehouse area: 1,000 m²
Net usable height: 8 m
Gross volume = 1,000 × 8 = 8,000 m³
Now think about two different warehouse racking system approaches:
m²-focused layout: lower racks, wider aisles
m³-focused layout: taller racks, more efficient aisle design
Using an example utilization efficiency:
m²-focused layout: 45% → 8,000 × 0.45 = 3,600 m³
m³-focused layout: 60% → 8,000 × 0.60 = 4,800 m³
The difference is 1,200 m³. That means a major capacity increase in the same warehouse. And that is only the volumetric view. When combined with pallet position count, SKU accessibility, and staging area design, the difference becomes even greater.
Decision Points That Determine Cubic Meter Efficiency in Warehouse Planning
Product Height Distribution in the Warehouse
If some products are 1.1 m and others are 1.7 m, choosing a single level spacing leaves “empty air” inside the rack. Level spacing is a direct determinant of m³ efficiency. Grouping products by height usually provides a quick gain in many warehouses.
Warehouse Aisle Width and Racking System Maneuvering
As aisles get narrower, capacity increases. But equipment selection and discipline become essential. At this point, narrow aisle racking system can significantly improve m³ efficiency with the right forklift and proper traffic planning. With the wrong equipment, it will lead to damage and slowdowns.
Balancing Warehouse Racking System Height and Operational Speed
Raising the racks increases capacity. But lifting time may become longer. Error margins grow on upper levels. Here, the goal should not be “maximum height” but the “optimum height” that the operation can handle.
Turning the Warehouse Building Shell into Capacity
If the building height is suitable but cannot be used enough with a conventional setup, approaches that turn the warehouse shell directly into a storage structure come into play. For example, clad warehouse racking systems can turn volume into a “building advantage.”
Not Clogging the Staging and Packing Area on the Floor
If staging/packing is cramped on the floor, layering the space with mezzanine systems leaves more floor area for storage.
Solutions That Increase Cubic Meter Efficiency in Warehouse Racking Systems
m³ efficiency increases not with a single rack choice, but with the combination of several correct decisions. The biggest impact usually comes from:
Adjusting rack levels according to product heights
Optimizing aisles according to equipment and flow
Increasing height in a controlled way (floor + anchoring + safety)
Expanding the staging and packing area without clogging the floor
Distributing access needs and density needs into the right areas within the same warehouse
This approach improves both storage capacity and on-site flow.
Combine the m² and m³ Logic When Choosing a Warehouse Racking System
Move | Effect on m³ efficiency | Effect on operations | Typical risk |
Increasing rack height | High | Medium | Upper-level damage, forklift limits |
Narrowing the aisle | Medium-high | High | Collisions, congestion |
Creating multi-level space | High | Medium | Incorrect layout, access confusion |
Using automation | Very high | High | Investment and maintenance needs |
How Does Cubic Meter Planning Change by Warehouse Scale?
As the scale changes, the focus of m³ planning also changes:
Small warehouse: the fastest gain is reducing wasted empty space between rack levels. Product height grouping is very effective here.
Medium-sized warehouse: aisle-equipment compatibility and proper layout determine both m³ efficiency and operational speed.
Large facility: standardization becomes important. A systems approach is needed to reduce errors while increasing volume.
If density and speed are both targeted in large facilities, solutions such as automatic storage AS/RS racks may come into play. m³ efficiency increases. The process becomes more stable. The investment decision should be evaluated with total cost logic.
Risks on the Floor When Planning Cubic Meters in Warehouse Racking Systems
If m³-focused planning is not done properly, risk increases instead of capacity. The most common on-site risks are:
Losing volume inside the rack by ignoring product height variability
Narrowing the aisle without adapting the equipment and traffic plan
Increasing rack height without checking floor and anchoring adequacy
Leaving fire safety clearances to the very end
Cramping picking/staging space while storage increases
These risks slow down the return on investment for the warehouse racking system.
Practical Tips That Increase m³ Efficiency in Warehouse Racking Systems
The following practical moves can make a difference in most warehouses in a short time:
Classify products by height and turnover speed. Set each zone’s level spacing accordingly.
Instead of assuming a “single pallet type,” divide pallet heights into 3 groups (low/medium/high).
If staging and packing take up too much floor space, consider a multi-level solution. mezzanine systems increase space here without increasing m².
For stocks that do not require frequent access, design a density-focused zone. mobile racking system can provide significant gains in such areas.
This approach improves not only capacity but also makes the layout inside the warehouse more manageable.
Closing: Manage the Warehouse as “Volume,” Not Just “Area”
In a warehouse, capacity is not determined only by how many m² you have. It is determined by how that m² is used with what height and which racking system design. Cubic meter-focused planning brings product dimensions, rack levels, aisles, equipment, and safety clearances into one picture. Thus, choosing warehouse racking systems is done with the goal of “using the most efficient volume” rather than “installing the most racks.”
Frequently Asked Questions (FAQ) About Cubic Meter Planning in Warehouses
Frequently Asked Questions (FAQ) About Cubic Meter Planning in Warehouses
Frequently Asked Questions (FAQ) About Cubic Meter Planning in Warehouses
How to Determine Net Usable Height in a Warehouse?
The real limit remaining below the sprinklers and installations is taken as the basis instead of the ceiling height. The safe lifting height of the forklift also determines the practical limit of this limit.
Is Narrowing Aisles Always Logical for Cubic Meter Efficiency?
Why Are Product Dimensions So Important in Warehouse Racking System Planning?
In Which Warehouses Are Mezzanine Systems More Advantageous?
When Do Automated Storage AS/RS Racks Make Sense?


Contact
Do you want to receive more information? We have expert and reliable contact persons available for any questions, issues, and suggestions.
Reta Engineering Warehouse Racking Systems Industry and Trade Inc.
Address
Muradiye Organized Industrial Zone, 10th St. No: 30 Yunusemre / Manisa
info@retamuhendislik.com.tr